 Sozdai
Step-by-step Card Generation
This is the classic four-step wizard. Some new users get the simple wizard (A/B test); switch between them in your profile under “Generation wizard”.
The wizard is a simplified generation mode where you make a minimum of decisions. Four steps: style → photos → details → result. Each step has one key decision.
The “Simple · Step by step · Pro” switch above the wizard picks the mode: Pro shows every setting on one screen (desktop only). This article covers the step-by-step flow.
Step 1. Style
The main question — how will the card look? Three options:
- Choose template — a ready-made style from the library (categories: "catalogue photo", "scene", "flatlay", "infographic" and more). Fastest, most predictable result.
- Copy style (reference) — pick a sample photo, AI copies its style (lighting, palette, composition). What exactly to copy is controlled by toggles.
- Create custom style (custom prompt) — describe the style in text ("neon gradient", "minimalism on white"). Most flexible but needs clear wording.
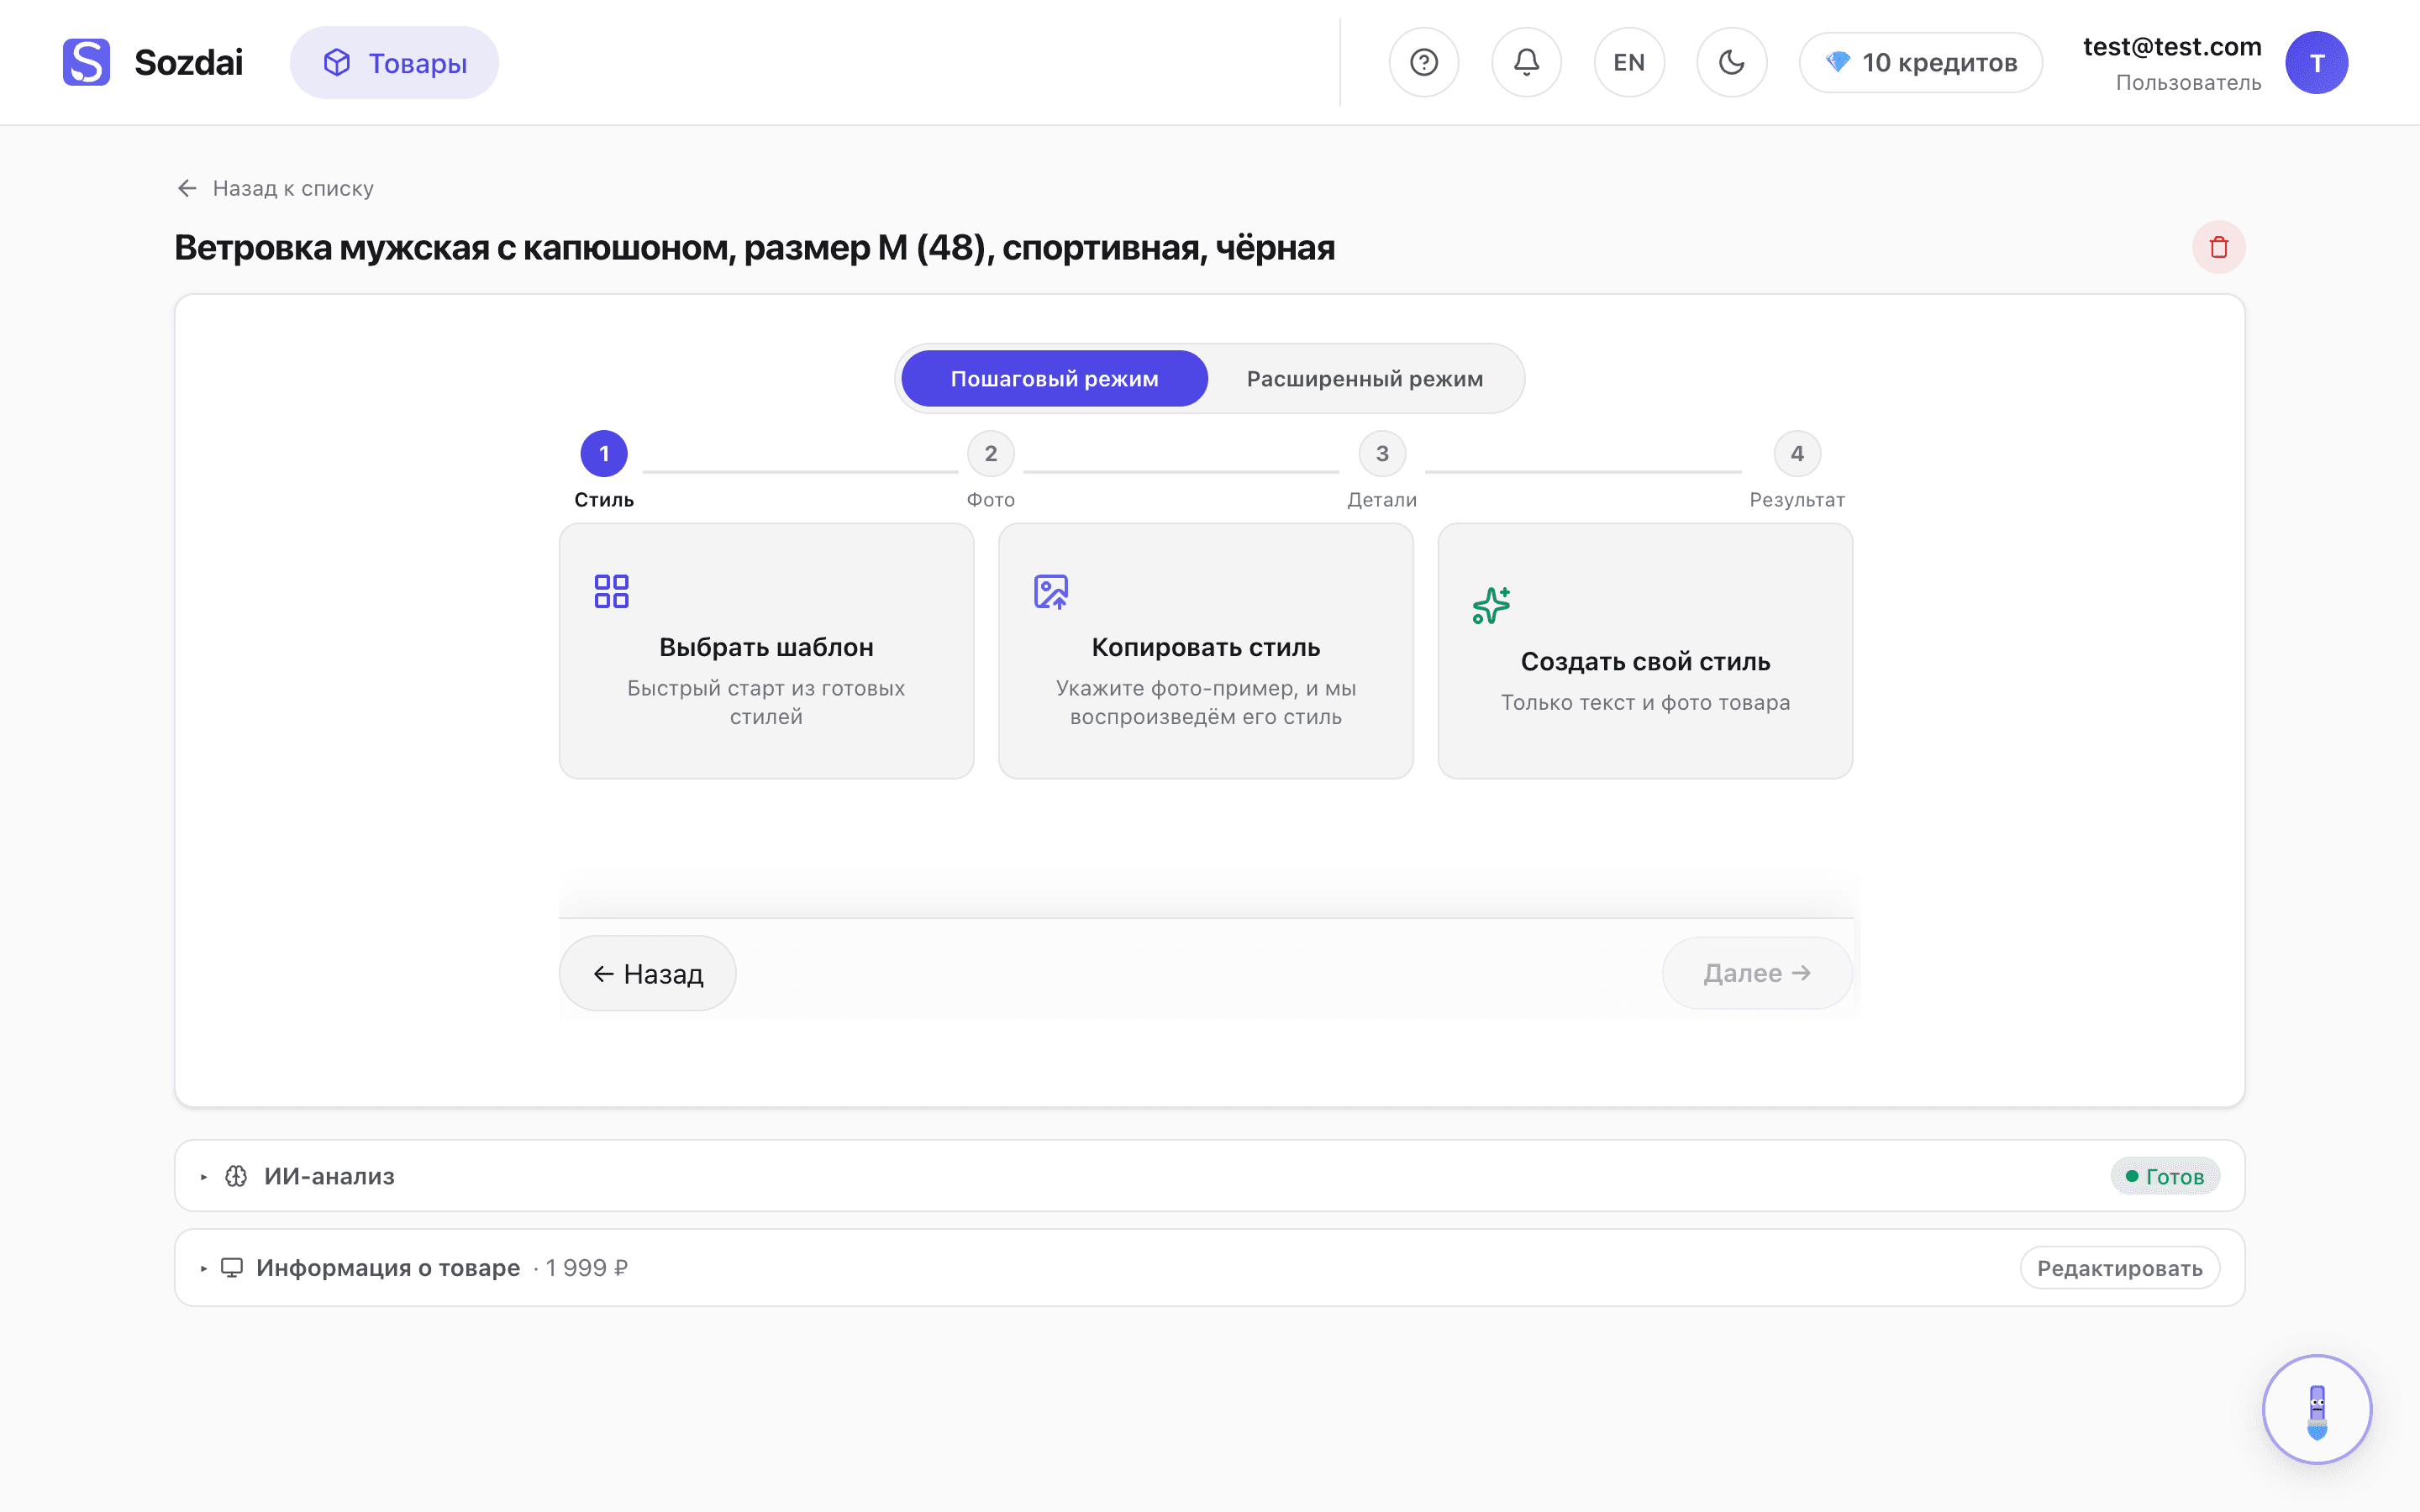
The "Next" button at the bottom stays disabled until you pick a style.
Some templates open a data block under the selected thumbnail: indications, composition, package contents, prices. The data comes from the product analysis, and anything missing is pulled from the description by AI — the block shows up already filled in. Any row can be corrected with "Edit", and if the AI found nothing, press "Fill in with AI" again or type the data by hand. Required fields are highlighted: without them the photo comes out incomplete, but generation is not blocked — it's your call. A service gets a different set: a "For services" category with nine templates, service wording on the familiar ones, and a "Recommended" badge on the templates that suit your subtype, which come first — see the "Avito listing mode" article.
Step 2. Photos
Here you choose which product photos to use. For a template the limit is 1 to 6 depending on the template (most templates take one photo); for your own card — up to 5 photos with “Fast” quality and up to 3 with “Quality”.
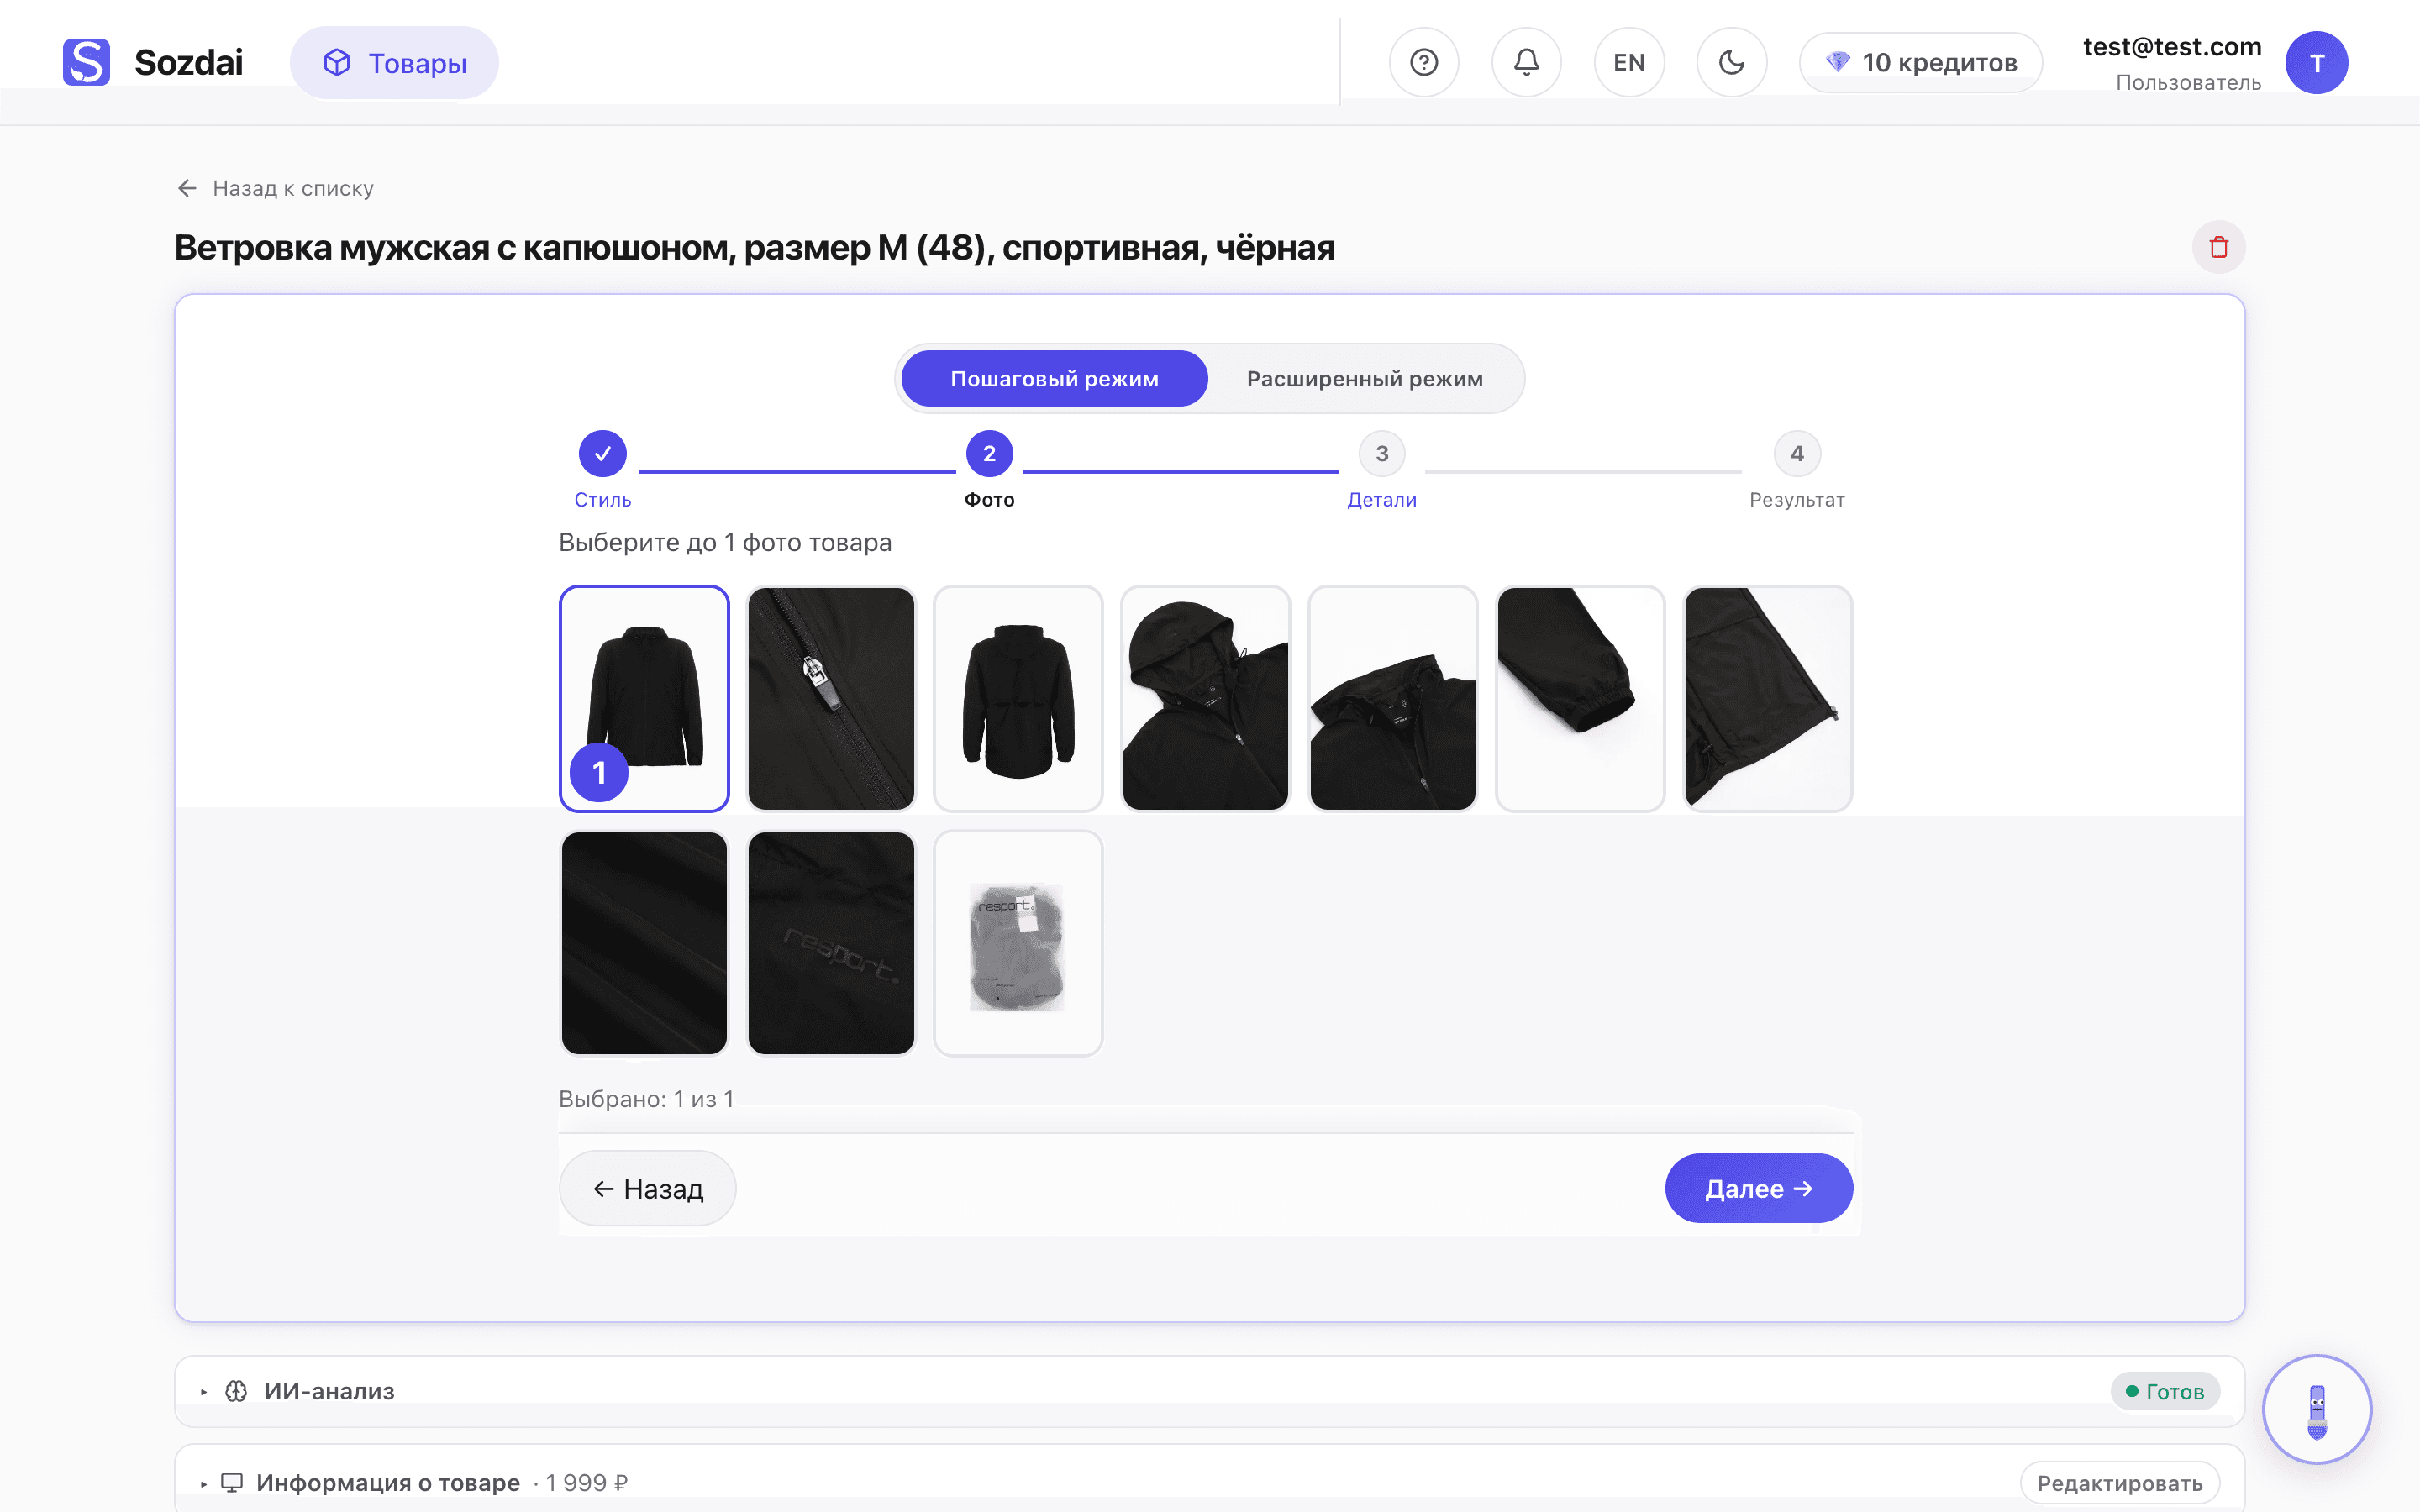
Click a photo to select, click again to deselect. The first selected photo is the primary one. If the product has only one photo, this step is skipped automatically. For a service with no original photos the step is skipped entirely — AI invents the scene from the "What you do" description in "Service information".
To upload new photos — "Add photo" button on the same step.
Step 3. Text
Here you define what text goes on the card and which features to show:
- Headline — three optional lines: an overline (small top), a main headline (large) and a subheading (small bottom). Any line can stay empty. AI has already suggested a variant from the product analysis — the main headline and a subheading. The AI rarely adds an overline — only when the buyer would otherwise miss something important; you can type one yourself. Keep or rewrite any of it.
- What to write on the card — checkboxes of features and advantages. Tick the ones that should appear on the card. Optimal — 1-5 items. More becomes clutter.
- Custom instructions — free-form prompt. "Blue gradient background", "add packaging next to product", "vertical format", etc. The field grows to fit your text — type 10 lines, no inner scrollbar. The "AI will suggest" button next to it auto-fills the field.
- Model — first field inside “Parameters”: Flash (2 💎, faster) by default, or Pro (4 💎, finer detail and small text).
- Parameters (advanced settings) — collapsed block at the bottom. Fine-grained knobs: headline size (auto/large/small), style preset (auto or 9 moods), format (3:4 marketplace default / 1:1 / 4:3), bullet styling (plates and icons). See the Pro mode article — same accordion appears in the wizard too.
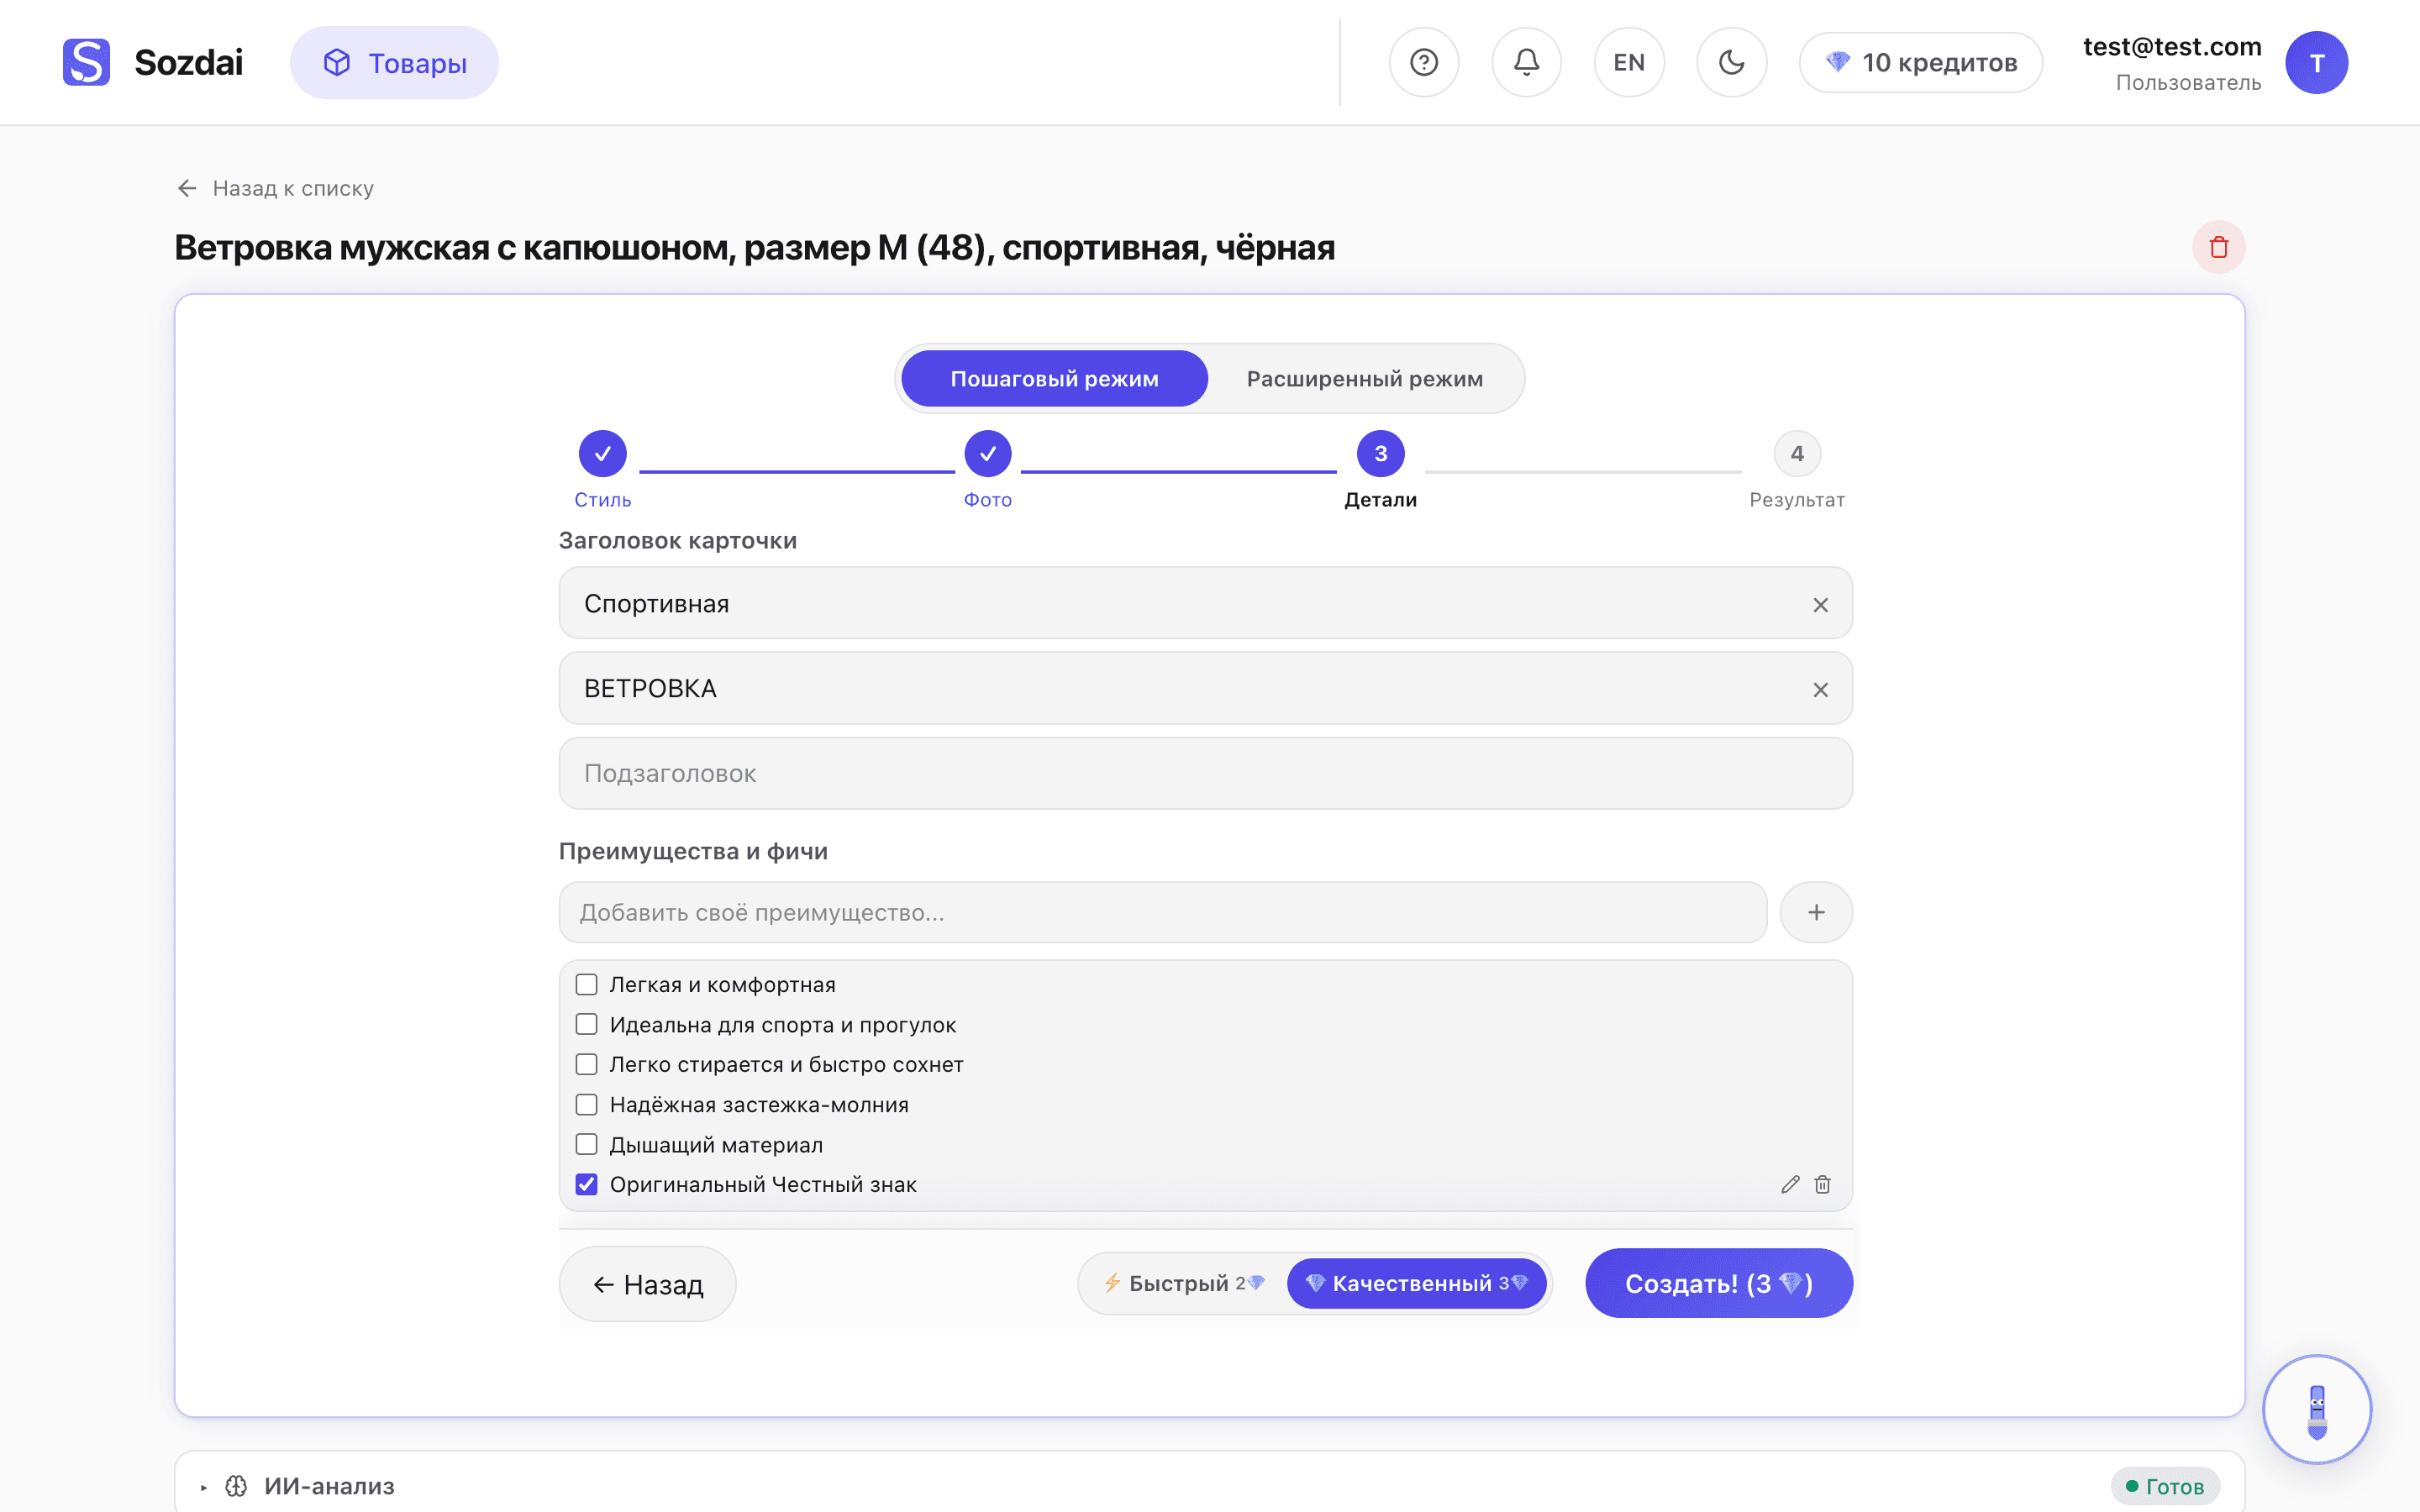
At the bottom — "Make the card · N 💎" button. Tapping it deducts credits and starts generation.
Step 4. Result
Generation usually takes 30–60 seconds depending on quality and current load — keep the tab open. While your card is being created, you can play a mini-game in its place — or just wait: the result will appear on its own. If a generation fails, the credits are automatically returned to your balance, and the "Try again" button reruns it with the same settings. If you don't have enough credits, the wizard charges nothing and offers a top-up right away.
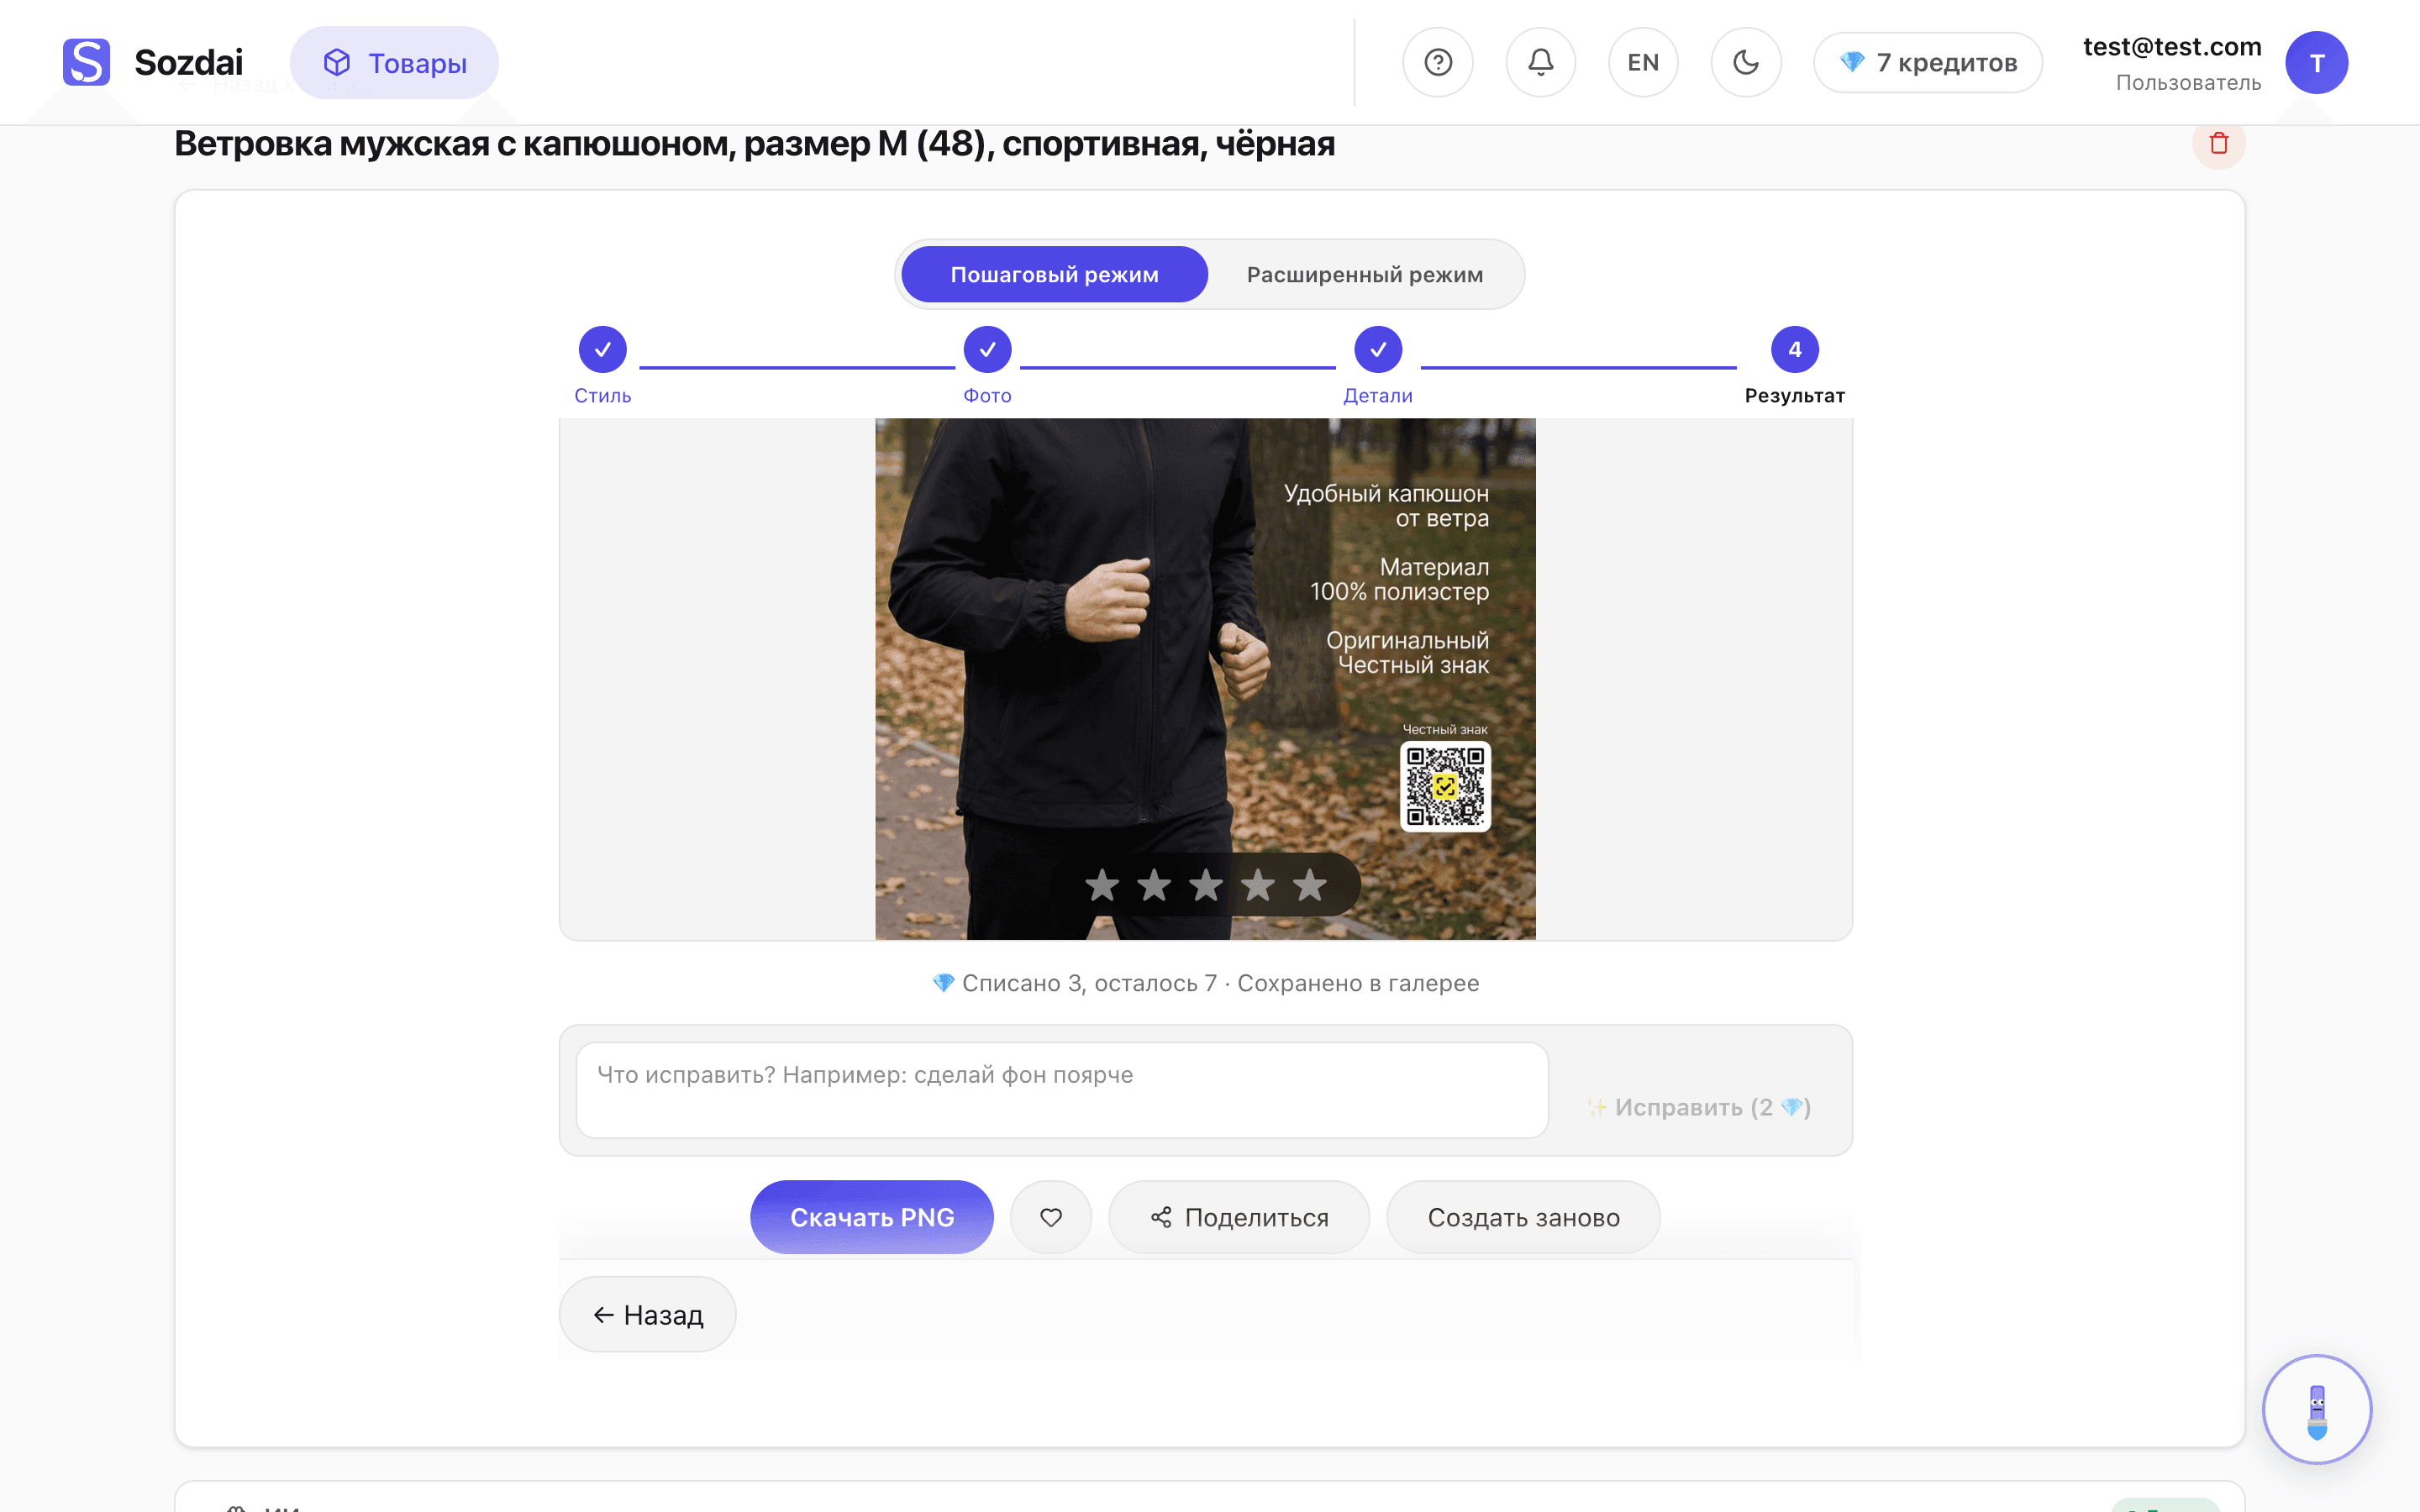
Three actions available:
- Download PNG — the image in full resolution.
- Repeat — regenerate with the same settings. AI gives a different result, same credits (handy if you just want another try).
- Fix (the "What to fix?" field) — the main editing tool, refine with text. Describe the change in words: "brighter background", "remove the bottom text", "move the logo left", "make the headline bigger". AI tweaks the image. 2 💎 per attempt.
All editing is text-driven: Sozdai has no canvas editor where you drag layers with the mouse, by design. Routine edits go through AI.
If you don't like the result
Nothing is locked in forever. If the card's not what you wanted — hit "Repeat" or use "Fix". "Create more" starts a new card from a clean slate. The AI prompt adapts to your requests.
Returning to the product card
At the top-left of the product page there's a back-arrow button. Inside the generator it reads «← Back to product» — click it to return to the photos + analysis view without losing progress. Wizard state (current step, photos, headline, instructions) is preserved — when you come back via «Create infographic», you land where you left off.
The system back button in the browser (or the back gesture on a phone) works inside the wizard step by step: from «Text» it returns to «Photos», from «Photos» to «Style», and from the first step back to the product. It simply closes an open window (the photo viewer, «Fix (AI)», a bottom sheet). If a card is still being made, going back doesn't stop the generation: the finished card will appear in the list; until then the «Make the card» button is disabled so a second one doesn't start.
The wizard step is stored in the URL, so Back, Forward and refresh work across all steps. Selected photos, style, text, settings and the finished result are kept in a draft in the current tab for up to 24 hours. Text and settings stay out of the URL: copying a link does not transfer the draft to another device. Refreshing an unfinished generation returns to settings without automatically starting it again. Photos, refinements, photo funnels and templates can be opened through direct links; access to the project is still required.
The final Step 4 has a separate «Done, back to product» button. Unlike the arrow, it resets wizard state — your next entry starts at Step 1 with a clean slate. Use it when you want to create the next card with different settings.
More on refine and regeneration — see Editing the result.