 Sozdai
Pro mode
Pro mode is the same card generator, just with every setting visible at once — no stepping through pages.
How to enable it
The "Simple · Step by step · Pro" switch sits above the generator. Pick "Pro" and the page turns into a three-panel layout. To give the panels room, the side menu collapses to icons while Pro is open; when you go back to the product card, the menu returns to how you left it. The choice is saved to your profile ("Generation wizard") and applies on every device. Pro is desktop-only; on the phone the step-by-step wizard is shown instead.

Three panels at a glance
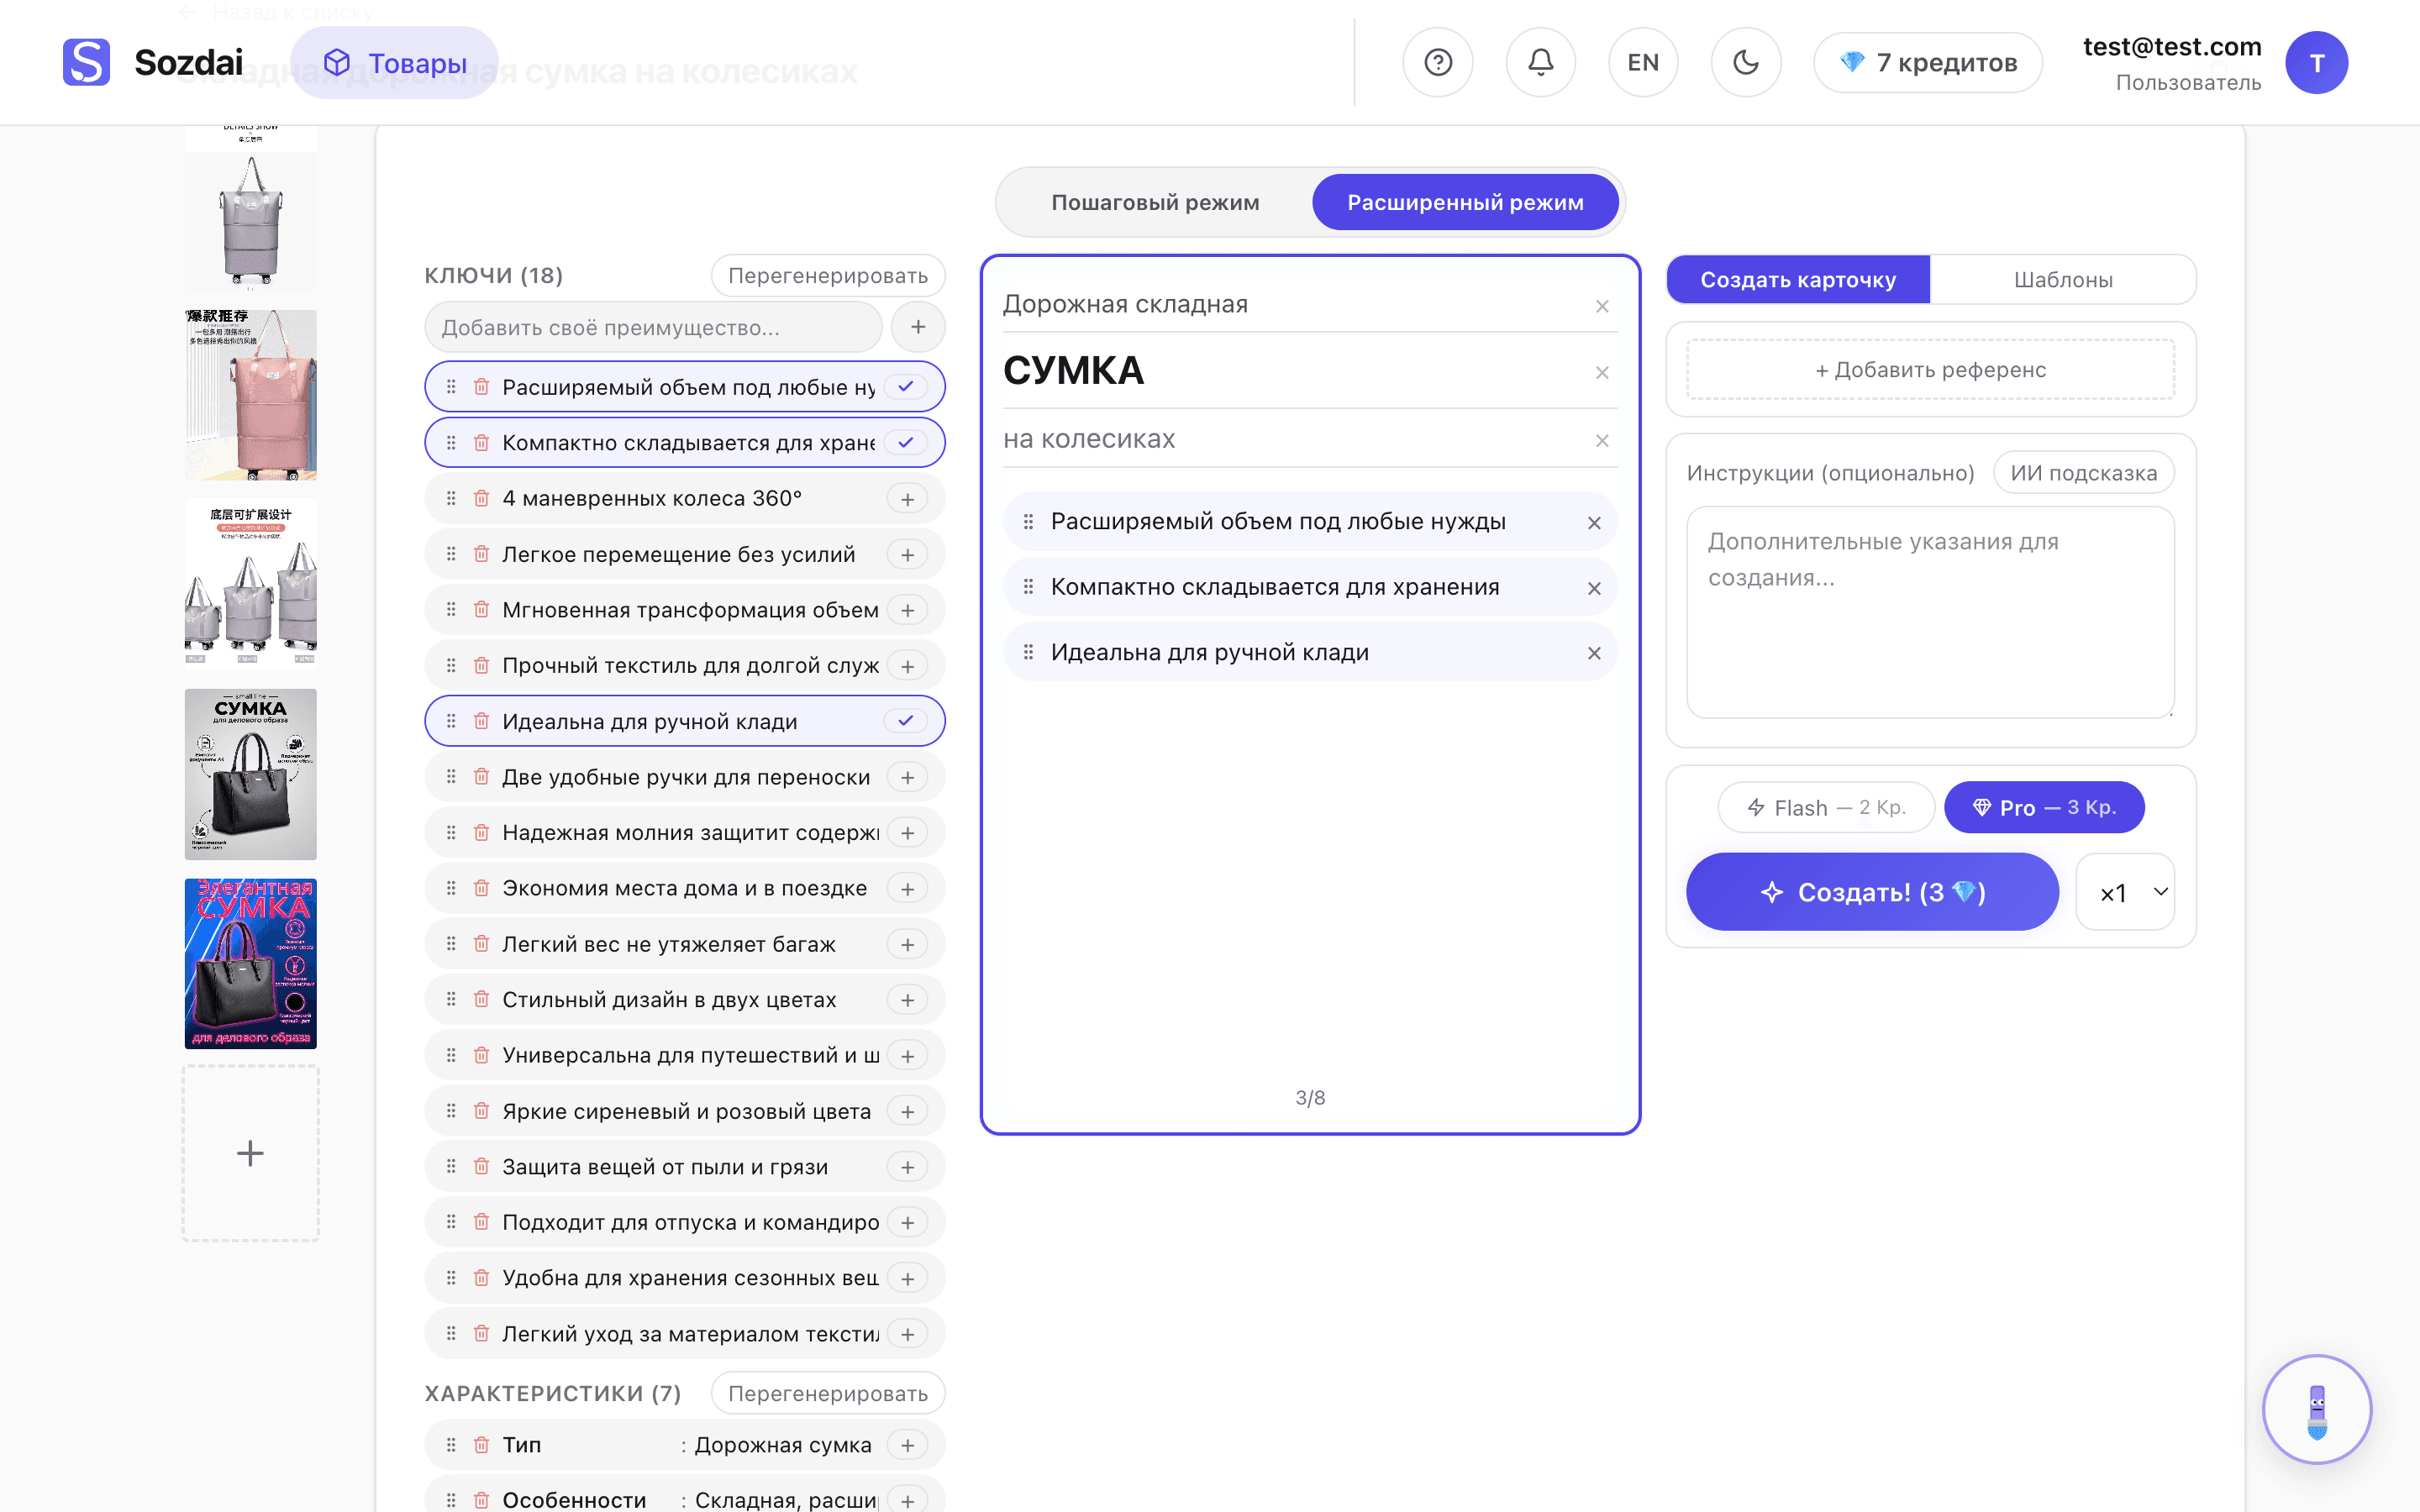
The screen splits into three columns:
- Left — product data: the statements and specifications from the analysis.
- Center — the card: headline, selected features, results.
- Right — style and launch: reference photo, custom instructions, quality and the Create button.
Product photos are picked in the strip of thumbnails to the left of the panels.
Each panel is covered in detail below.
Left panel: product data
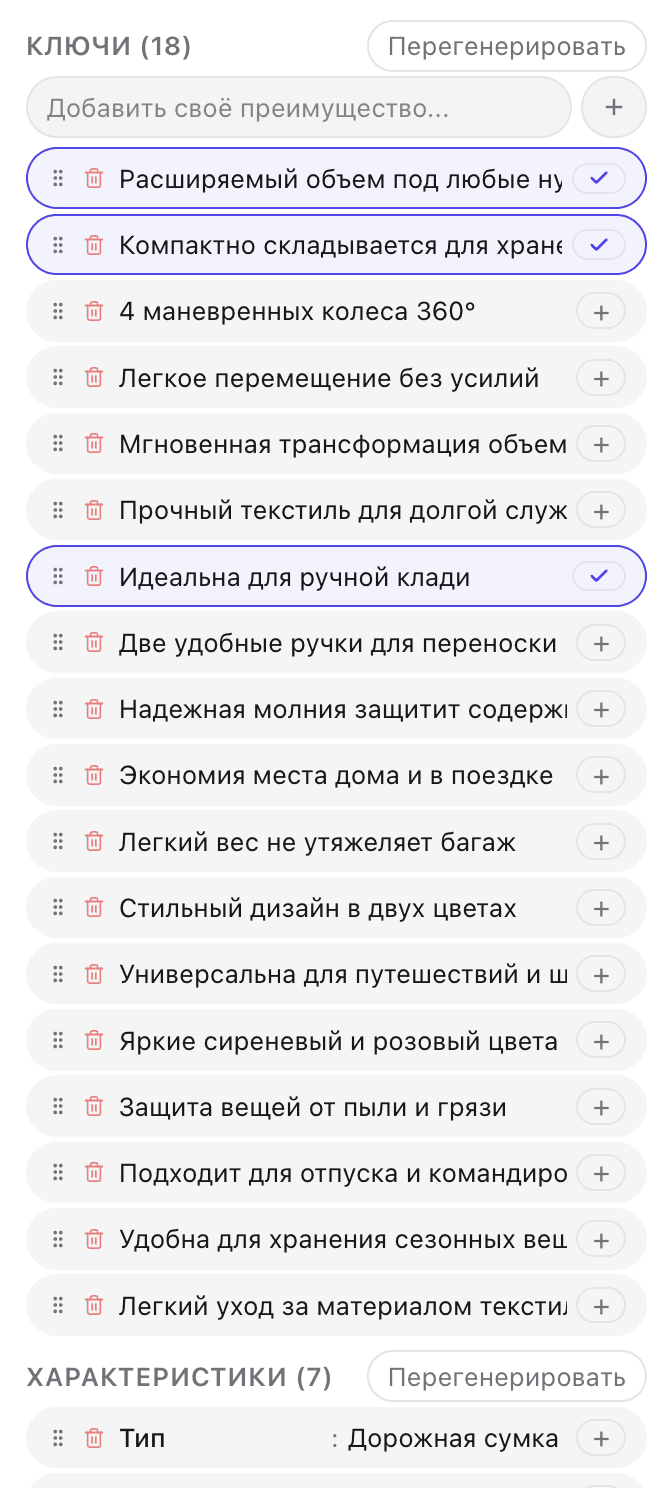
This contains the "Bullets" (key statements) and "Features" (specifications) blocks — the same ones you'd see in the analysis editor, embedded directly in the generator. Check the items you want to appear on the card. Each block has a regenerate button (🔁) if the AI's suggestion isn't working for you. You can also add your own statements manually from here.
More on working with the analysis in Editing Analysis.
Center panel: generation and results
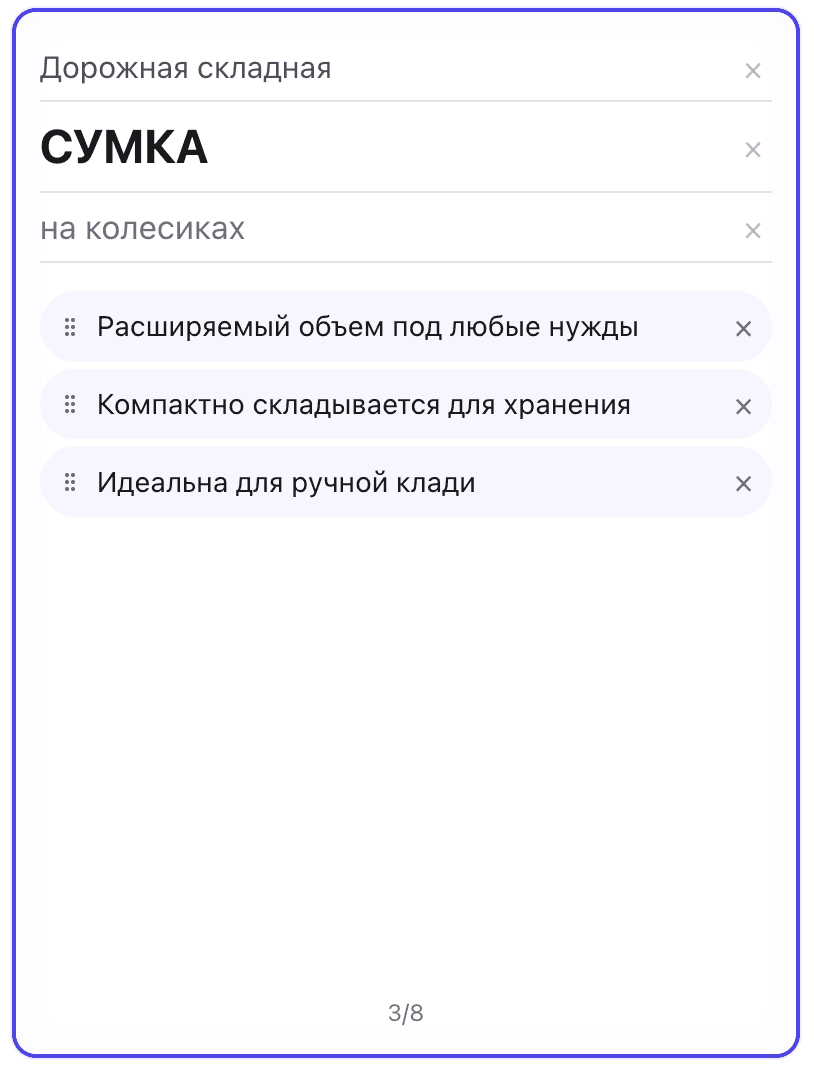
At the top — three headline fields: overline, main headline, and subheading. All three are optional. The AI pre-fills them from the product analysis: the main headline and a subheading, an overline only rarely. You can edit or clear any of them.
Below — the selected features. Drag to reorder them, which changes how they're laid out on the card.
At the bottom of the panel — two tabs:
- Layout — a preview without AI generation. Useful for checking the composition before spending credits.
- Result — the list of generated cards. Results accumulate as you generate more, so you can compare variants without leaving the page. Below the selected result is a refine field for text-based edits.
Right panel: style and photos
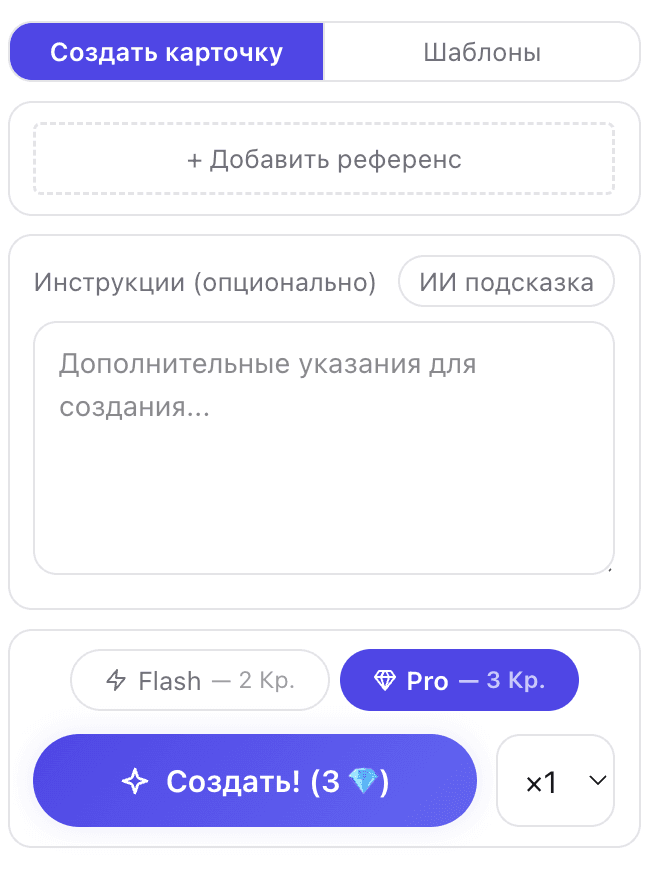
The top section is for the reference photo and the six copy-* checkboxes (lighting, palette, composition, props, background, text style). For details on what each one does, see Style Reference.
Below that — the Custom Instructions field with the "AI will suggest" button. How it works is covered in Custom Instructions.
Further down — the collapsed "Parameters" block (advanced settings), with the model choice first (Flash · 2 💎 / Pro · 4 💎), the "Create!" button and the number of variants (×1, ×2, ×3).
Product photos are picked in the strip of thumbnails to the left of the panels: select up to 5 product images (up to 3 with “Quality” and on the templates tab) to include in generation; the first one is treated as the primary photo.
If the selected template needs its own data, the same block as in the step-by-step wizard appears on the right panel's "Templates" tab (switched with the pill at the top of the panel), above the headline checkboxes: labels, a "how many items" counter, an "Edit" button and "Fill in with AI". The data is shared with the product card — an edit here shows up in the analysis immediately and vice versa.
Advanced settings
Below the main controls in the right panel there's a collapsed «Advanced settings» block with fine-grained generation knobs. The same five settings are also available in the wizard on the «Text» step — it's a unified system. Expand the block to see five toggles:
- Headline size —
auto/ large / small. Auto lets the AI decide based on the headline length. «Large» forces a big main headline (good for short copy), «small» forces compact headlines. - Style —
autoor one of nine mood presets: premium, minimal, bright, standard, retro, neon, organic, brutalist, editorial. Auto picks based on the product. Lock a specific preset if you need a predictable visual language across a series of cards. - Format —
3:4(vertical, marketplace default),1:1(square), or4:3(landscape). Wildberries / Ozon require3:4. Other formats target social media or banners. - Bullets → Plates under text —
auto/ on / off. Controls whether each bullet sits on its own plate (pill, glass, outlined) or as plain text on the background. Auto lets the AI decide; «on» forces plates, «off» forbids them. - Bullets → Icons —
auto/ on / off. Same idea: whether to add a small icon next to each bullet or keep text only.
For Avito listings with photos — a service or a brand — one more row appears under «Style»: «How much to change the photo». Four levels: «Keep as is» — the photo is the picture, we add the text and fix the light; «Tidy up» (default) — same scene, same frame: cropping, light, clutter removed, while the lettering and graphics get a designer's full care; «Redesign the scene» — people and objects from the photo stay recognisable while the AI designer picks the setting, the cropping and the light for the idea; «Reimagine from the photo» — the photo gives the idea, the object and the colours, and the scene is drawn anew. A marketplace product has no such row: the product must stay identical. Without photos or with a style reference the level has no effect. The choice lives in this session and is not saved to the profile defaults.
The «Save as default» button at the bottom of the block locks your choice for all future cards, not just the current one. The «Reset» button restores the saved defaults.
The Plates and Icons settings only apply when bullets are rendered (the feature checkboxes are on). If bullets are off, these two toggles are grayed out with a tooltip.
Returning to the product card
At the top-left of the product page there's a back-arrow button that's contextual: in Hub it reads «← Back to list», inside the generator it changes to «← Back to product». Click it any time to return to the photos + analysis view without losing progress. The generator state (selected photos, headline, instructions, chosen template or reference) is preserved — when you come back via «Create infographic», you land where you left off.
If you want to start a fresh generation from scratch — the final Step 3 of the wizard has a «Done, back to product» button that also resets the state.
When to switch to Pro mode
Pro mode saves time when:
- You've got the wizard flow figured out and want to work without stepping through pages.
- You need to adjust the headline, style, and photos at the same time — everything's visible at once.
- You're testing several variants back-to-back: results stack up in the center panel and are easy to compare without reloading.
If you're just starting out, begin with Step-by-step Card Generation — the wizard is easier to follow at first. For reference photo settings, see Style Reference. For the free-form prompt, see Custom Instructions.